Showing posts with label Birthday. Show all posts

Friday, 26 June 2015

From the Heart

Good evening :)

This week I am here to share with you my Design Team piece using the fabulous From the Heart available through SlinkyXTart. 


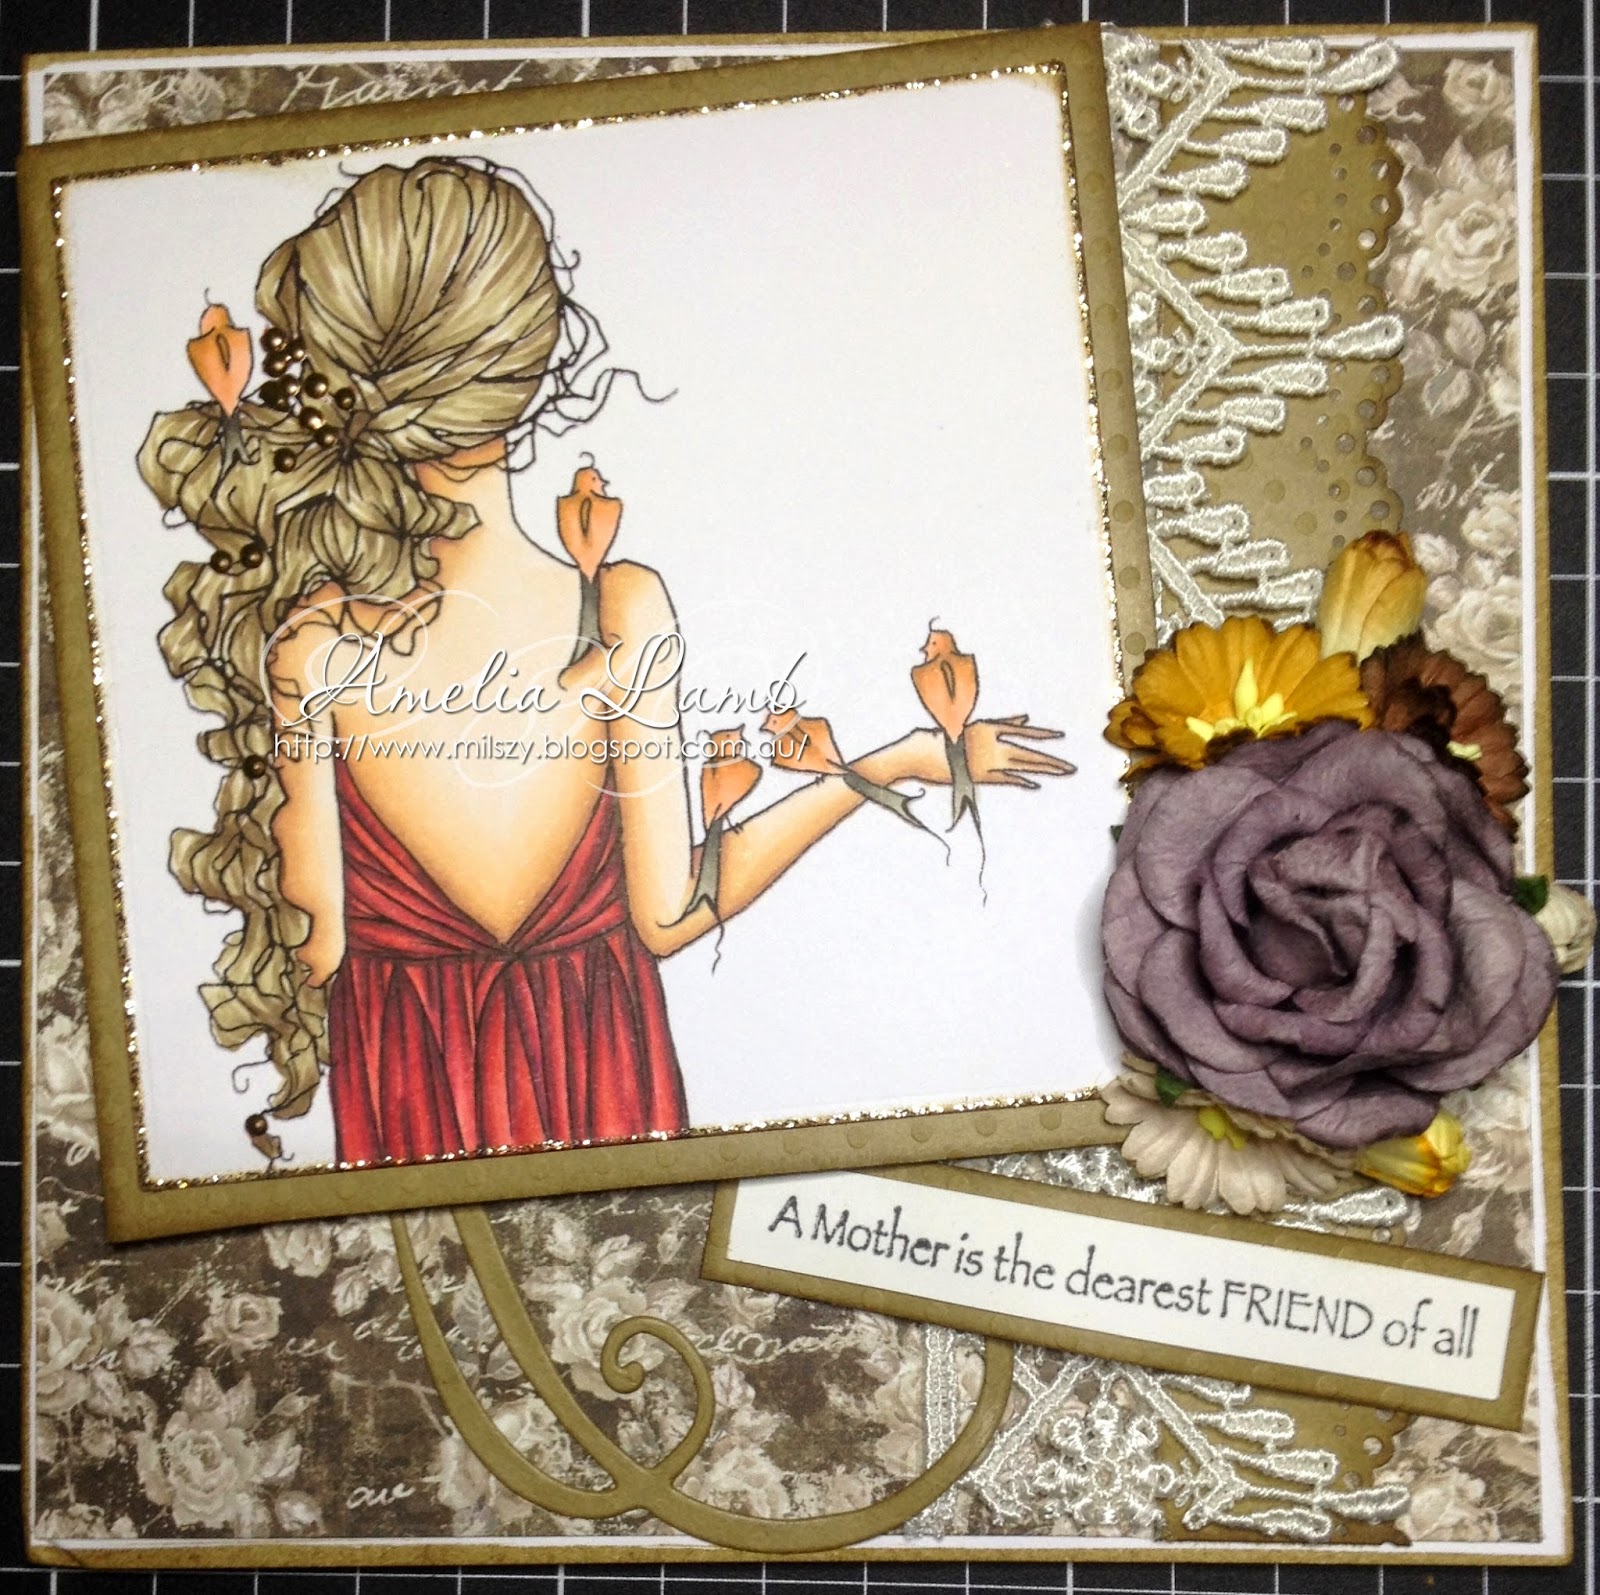
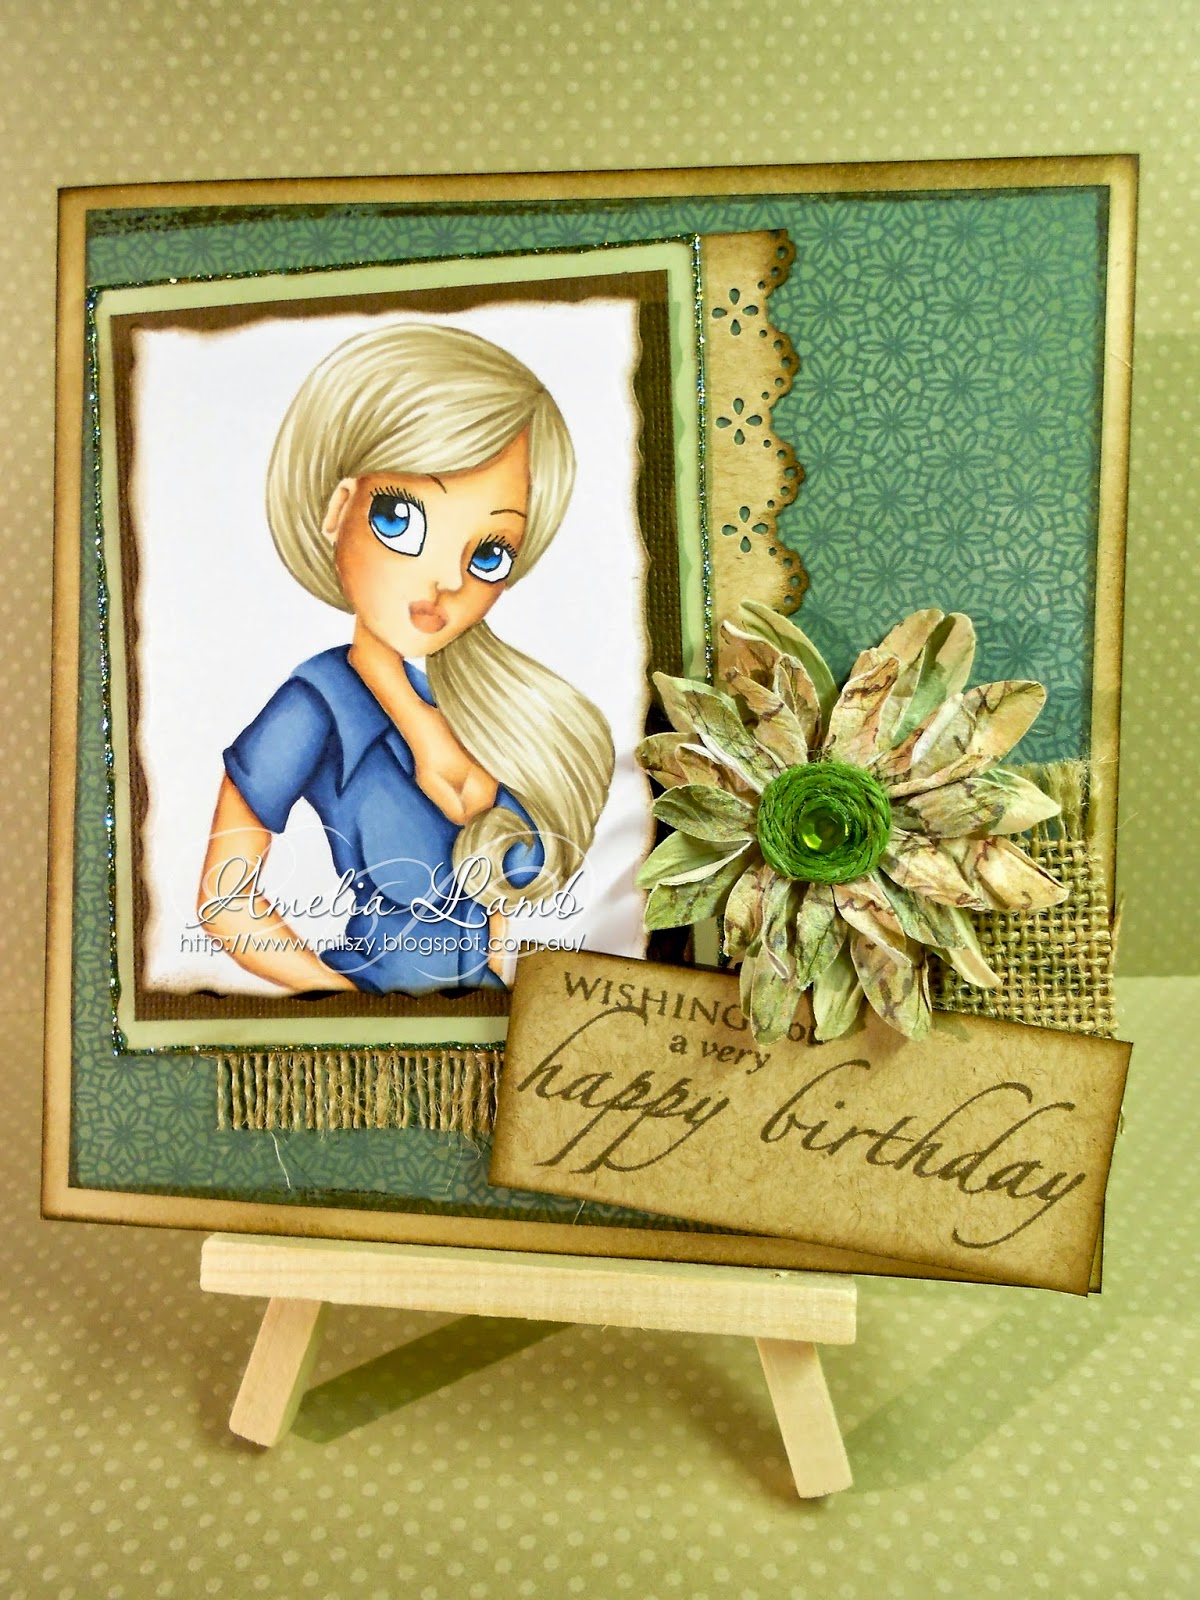
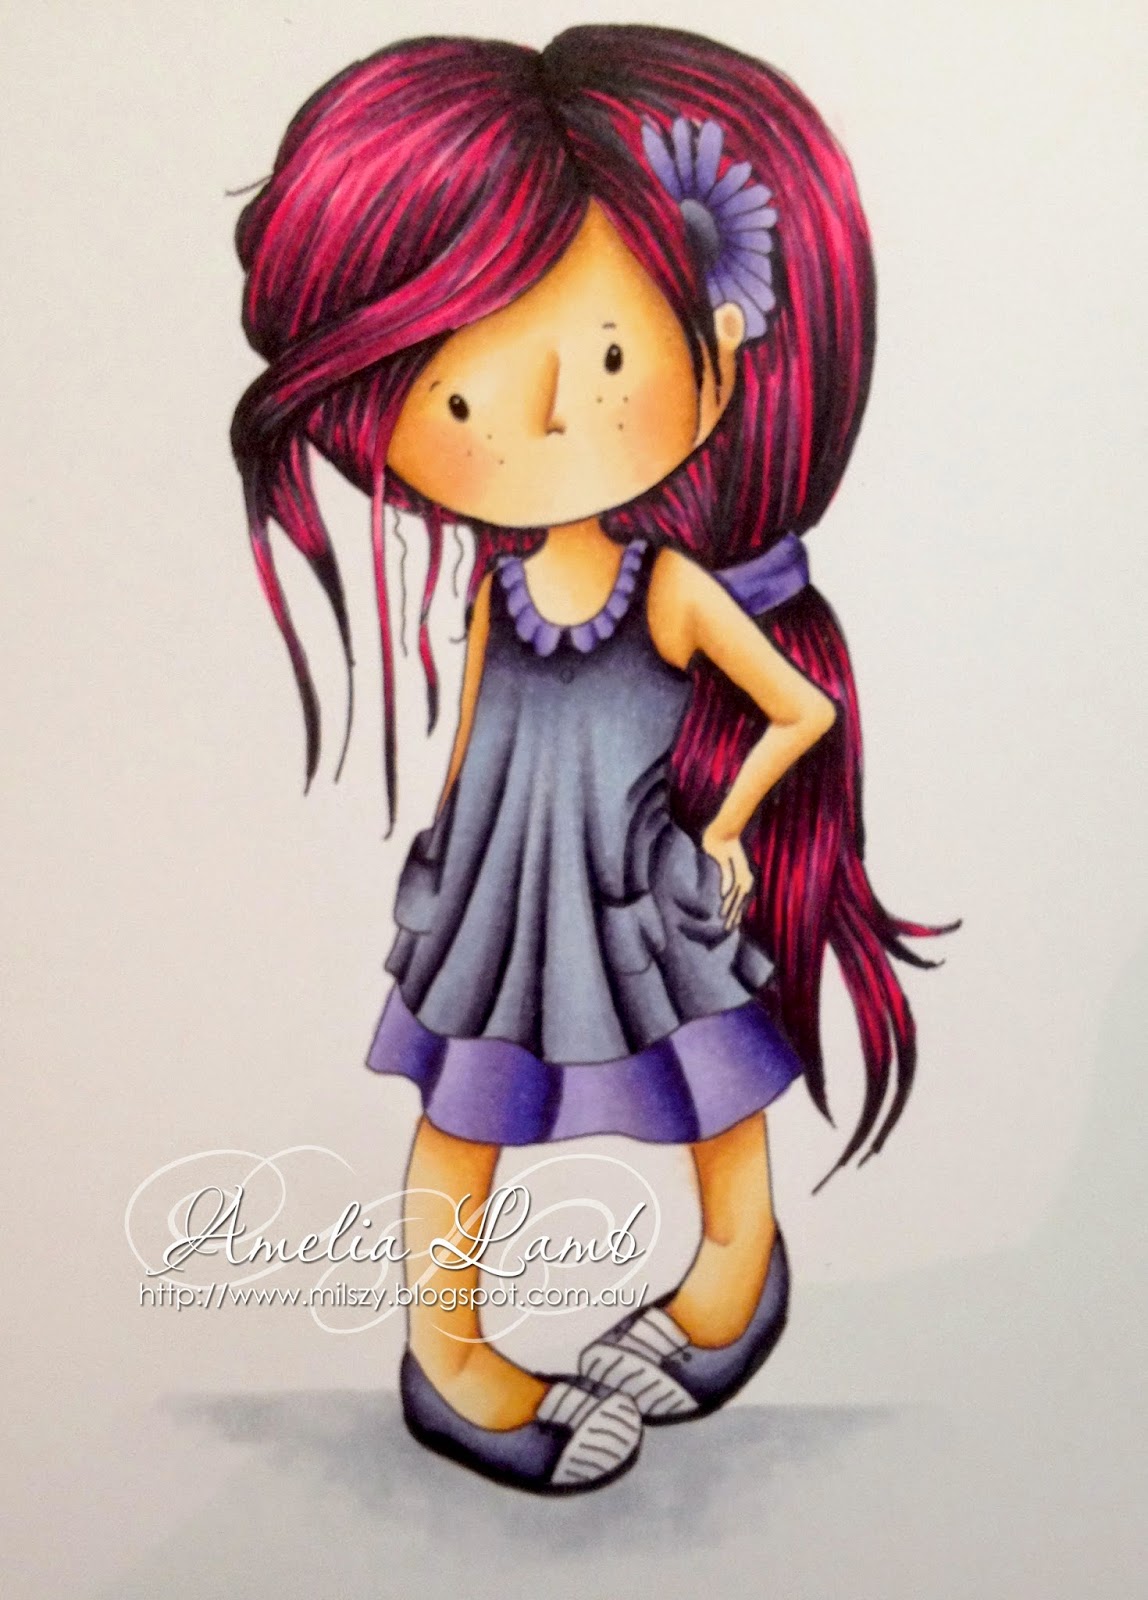
Clean and simple certainly seems to be my style these days, and with images this gorgeous I don't think it needs much more :)  So for this smexy girl I have paired her with beautiful backing paper from Kaisercraft call Furry from the Teddy Bears Picnic collection.  I have matted the image on kraft card, with a punched border along one side and then added a simple flower, a sentiment using a Kaszazz stamp and banner I made.


Copic Colours
Skin - E000, E00, E21, E11, E13 & R20
Hair - E49, E47, E44 & E43
Top- C5, R59, R39, R29, R27 & R24
Pants - 110, C9, C7 & C5


Thanks for stopping by and having a look today.  Don't forget to check out the rest of the design team creations over at the blog.

Don't forget to also come and join us at the Facebook group and share all your Slinky makes with us!!

xx


Friday, 15 May 2015

Good evening :)

Today I am here to show you this gorgeous image from SlinkyXTart called Keeley, how gorgeous is she!!  


The background was made using a memory box stencil called brilliant and some green Viva Decor Inka Gold Paint.  It leaves a lovely metallic raised effect, dries super quickly and easy as to clean up afterwards :)

A close up of this Slinky gal :)


Copic Colours
Skin - E000, E00, E21, E11 & E13
Hair - E50, E51, E53 & E55
Top - RV29, RV25, RV23 & RV21
Briefs - 100, C9, C7, C5
Eyes - BV0000, BV31 & BV34

Thanks for stopping by and having a look today.  Don't forget to check out the rest of the design team creations over at the blog.

If you would like to join the Facebook group send me a PM and I will add you in :)


Saturday, 2 May 2015

Purrrfect Day

Good morning :)

Today I am here to show you this gorgeous image from SlinkyXTart called The Cat's Meow.  Although I have used my own sentiment, you also get 2 awesome ones along with the purchase of this image.


A close up shot of this super sexy cat woman :)


Thanks for stopping by and having a look today.  Don't forget to check out the rest of the design team creations over at the blog.

If you would like to join the Facebook group send a PM and I will add you in :)


Friday, 6 March 2015

Hunting for Birdies

Hey there, hi, hello :)

Welcome to another inspiration blog post for SlinkyXTart.

This week I am here to share with you a make called Hunting for Birdies.

I have a friend whose a mad keen golfer, he is out there every Saturday morning, so this image is absolutely perfect for him.

To keep up my colouring work, and pushing myself outside of my boundaries I have done another no lines piece, tough stuff, but really happy with the overall result :)

On to some pictures :)


I have used the gorgeous papers from the Kaisercraft 12x12 Mix & Match paper stack again for this, such awesome and versatile papers, I love them!!  I think you might be seeing quite a number of cards made with this paper!!  The sentiment is from Paper Smooches and stamped on some kraft card I had in my stash.


Copic Colours
Skin - E000, E00, E21, E11, E04 & R20
Hair - E57, E55, E43 & E53
Lips - R20, R22, E93 & E95
Eyes - E25, E23 & E21
Red - R24, R27, R29, R46 & R59
Grey - C9, C7, C5, C3 & C2
Green - BG78, BG75 & BG72


Thanks for stopping by, and if you would like to join the SlinkyXTart Facebook group, friend request me on Facebook and send me a private message so I can add you in :)

xx


Wednesday, 24 December 2014

The Stamping Chef Final Challenge

This post is done with a little sadness as it is for the last ever challenge at The Stamping Chef.  Tamara is ending TSC at the end of the year, but don't despair she will be back in the new year with a new brand Slinky<3Tart - make sure you join the new Facebook group to keep up with all the news.  There might also be a 30% sale posted there so you can grab all TSC images you have had your eye on before the store closes at the end of the year.... just sayin ;)

So without further ado I am here today with a piece using the first stamp I ever coloured from TSC, Alyce.


I love this fairy and her hair has always been a challenge for me, but I think I might finally be getting it :)


Copic Colours
Skin - E000, E00, E21, E11, E04 & R20
Eyes - G46, G43 & G40
Hair - BV29, BV25, BV23 & BV20
Dress - V99, V95, V93, V91 - BV29, BV25, BV23 & BV20
Gloves - RV99, RV 95, RV93 & RV91
Wings - V28, V25, V22, V20 - RV10, RV34 & E04

Around the image I shaded with Distress Ink Milled Lavender to give it a softer appearance.

Don't forget if you are entering a Stamping Chef image for this final challenge to share it with us over at TSC Recipes Facebook group.

I hope you will join us at Slinky<3Tart and I look forward to seeing you in the new year.

May you and your families have a very Merry Christmas and a safe, happy and healthy new year.

Thanks for looking

xx


Wednesday, 1 October 2014

The Stamping Chef Challenge # 49

Good afternoon,

I'm here today with my design team sample for The Stamping Chef Challenge # 49  Anything Goes.

This week I have done something a little different using Toot my Scoot.  This colouring technique was inspired by my Grandmothers wedding photos from the late 30's, early 40's.  At that time colour photo's were very rare, but they did sometimes add colour to the picture once the photos had been developed.

Using my distress inks I did all my shading on the image using Black Soot, and then added a wash of colour over the top to achieve the effect. Antique Linen, Victorian Velvet, Peacock Feathers, Pumice Stone, Brushed Corduroy and Festive Berries were the other colours used to achieve the look.


Make sure you stop past The Stamping Chef store and see all the other gorgeous images available for purchase, with new ones being added all the time!

Don't forget to come share your creations with us over in the TSC Recipes Facebook group as well, we would love to see you there!

Thanks for stopping by :)

xx


Monday, 22 September 2014

A Day for Daisies

Good Evening :)

I have spent time this evening updating my Pinterest with images of cards and getting up to date with the Copic Colours of the Day from Jennifer Dove.  I am finally done and ready to head off to bed and realise I haven't shared with you a few more cards I have made recently, three with images from A Day for Daisies, and one from Tiddly Inks

I came across ADFD about 6 months ago now but resisted buying any of the images until just recently.  They certainly have a unique look to them and bring something different to the digital image world.

First up is a card I made for Miss C with Spring Flower Hair


This year for my Ma's birthday I went with another ADFD image Pearls in my Hair, this was the first image I saw from ADFD and was always on my list to make a card with.


The sentiment came from some Kaisercraft mini stamps I have, and was just perfect!!


Next is an image call Bewildered B, when I first saw the line art for this I wasn't sure how I was going to colour all that gorgeous hair, but once I had broken it down it was actually quite easy :o)  This was such a fun image to colour up.


Finally a birthday card without using an ADFD image :o)  This image is from Tiddly Inks called Druscilla.  This was my first attempt at two tone clothing, and I think it worked out pretty well for a first go :o)


Thanks for stopping by

xx


Sunday, 21 September 2014

Boys, Boys, Boys....

Good afternoon, it has been a glorious sunny day here in Adelaide and I am on the couch feeling sad and sorry for myself with a head cold.  However it does afford me some time to catch up on posting some recent projects.  

Today I have 3 projects to show you, all for some of the many boys in my life, LOL that sounds terrible but between my family and work I am surrounded by them!!

So first up is a birthday card I made for my brother in law.  Since I have known him he has had this painting on the wall of his home, it is of an outback house and it was painted for him by his brother for his 21st birthday.  This painting used to hang in the old lounge room above the TV, and I would find myself staring at the painting more often than actually watching the TV.  This image from Make It Crafty reminds me so much of this picture. This is Aussie Outback Shack


A close up of this beautiful image -


This next card is a very clean and simple design for a birthday card using these awesome Candle dies from Elizabeth Craft Designs.  The Happy Birthday was made downloading a font from dafont.com called gothical created by Pi Luo Chiu.


Finally a card I made for me and my team to sign to farewell a colleague into retirement.  Phil had been with our company for 23 years, he had so much knowledge and experience and would take the time to teach all of us about how things worked and why things were done a certain way.  For me who is most definitely not a technical expert Phil was so patient when explaining things to me so that I could understand.  He will certainly leave a hole in our team, and will be dearly missed by all.  As he moves into retirement he plans to take up lawn bowls, so Shot Bowl Sid from Just Inklined was perfect :)  (my apologies this photo was the best of a bad bunch...apparently I couldn't take a clean photo that day...)


Thanks for stopping by to have a look :o)

xx


Wednesday, 17 September 2014

The Stamping Chef - Jenna

Welcome to The Stamping Chef - Challenge # 47

As always our theme is Anything goes, and you can enter a project with any image you like although we do love to see your Stamping Chef makes :)

This week I have taken a step outside of my comfort zone and coloured up Jenna with 'no lines'.  Jenna reminds me of a gorgeous country girl, and so I made this card with that theme in mind.  I hope you like it.


Copic Colours
Skin - E000, E00, E21, E11, E04 and R20
Lips - E04 and R20
Hair - E41, E43 and E44
Shirt - B91, B93, B95, B97 and B99

I hope you come along and join along in this week's challenge and don't forget to head over to Facebook and join The Stamping Chef TSC Recipes group and share all of your Stamping Chef makes with us!!

Thanks for looking xx


Tuesday, 2 September 2014

Girly Birthdays

Hello :)

In my world, I don't have many little girls to make cards for.  I have three nephews so cards for little people usually consist of trucks, cars, planes, motorbikes, dinosaurs, dragons or monsters....and very little bling ;)

This weekend was fun, stressful but fun!  My friend is Mum, and Stepmum to two gorgeous little girls who were celebrating their 2nd and 9th birthdays.

Over on the Kit and Clowder Facebook page Polkadoodles had the most amazing image give away to coincide with a funky hair challenge put up by Alyce. Everything fell into place, and it was the perfect image to use for Miss I's 9th birthday card.


A close up of the gorgeous Miss Luna from Polkadoodles.


Copic Colours
Skin - E000, E00, E21, E11, E04, R20
Tunic/Shoes - BV29, BV25, BV23, BV20
Skirt - BV01, BV11, BV13, BV08
Hair - C9, C7, C5, RV29, RV25, RV23

Little Miss E was turning 2, and the image Baby Unicorn from Make it Crafty reminded me of a My Little Pony.  I wanted to colour it in bright, fun colours.  I certainly achieved bright :)  The mane gave me grief though, pink is soooo not my colour, and I lost it half way through and almost started again.  I persevered though, and I was really happy with the end result :)


This image shows the Clear Wink of Stella brush I used through out its mane to give some beautiful soft sparkle :)


Copic Colours-

Pony - B06, B05, B04, B02, B01
Hooves - B39, B37, B34, B32
Mane - RV09, RV06, RV04, RV02
Eyes/Horn - V01, V04, V05, V06, V09

Two very happy little girls to be spoilt by everyone on their birthdays.

Thanks for looking xx


Monday, 20 January 2014

Tiddly Inks Birthdays

This year has already seen two birthday celebrations in my circle of friends, and for both ladies I have gone to a Tiddly Inks Wryn stamp.  I love these stamps, so wonderful to colour and to be able to practice making their hair look like individual strands.

First up Miss Sharon's birthday was on January 8th and I coloured up Wryn.


Using Kaisercraft paper she was given a reasonably CAS card layout


Next up, my neighbour miss Nicola's birthday was the 18th.  Although we have lived next door to each other for a number of years our friendship has just started to flourish over the 12 months.  Nicola is not a card maker, and so this is a whole new world for her when I talk about these things I make.  Her reaction when I gave it to her was just beautiful!!  As Nicola is a nurse I used the image Wryn - New Wings


Using black, red, silver and white as my main colours I came up with the following.  I really enjoyed making this card, and putting together the embellishments for it also.


This close up above shows the GORGEOUS effect of aged silver Frantage on the scroll.  I love this stuff, it has silver, grey, black, and a bit of gold all in the one embossing powder and gives you the most amazing effect whilst being so dang simple to use!!


Happy Birthday ladies, I hope 2014 brings you good health, happiness, laughter and may all your dreams come true xx

Thanks for stopping past.

xx


Sunday, 1 September 2013

Backyard General

Evening all,

I hope you have had a lovely weekend.  The weather here in Adelaide has just been awesome, beautiful warm sunny days which is a nice change :)

Last week my oldest nephew turned 9 making Aunty Milly feel very old ;)  I had bought the gorgeous little Backyard General Saturated Canary Stamp from Little Darlings many months ago now ready to James' card with.

I wanted to paint him with army camouflage, but just didn't have any paper to match so I decided to make my own using my distress stains.  I was really happy with how it turned out.

The 'net'  I made using some hessian and pulling out strands until I was happy with the effect.  I put some eyelets in and attached it to the card using some chocolate brown string I had in my stash.


For my camouflage paper I started with a white piece of card, and added a layer of Antique Linen distress stain over the whole piece.  Once the first layer was dried I added a random patter with Shabby Shutter, Frayed Burlap and Walnut Stain Distress Stains. I then went back in with a sponge and the same colour browns to 'dirty' it up a bit, for the green I used Forest Moss instead of the Shabby Shutters as it was a darker, browner green.  The stamp around the edge is from Kaisercraft called Distress.


A close up shot of this cute little guy :)


Thanks for stopping by :)

xx


Related Posts Plugin for WordPress, Blogger...