Sunday, 30 March 2014

March Challenges

Good afternoon bloggers,

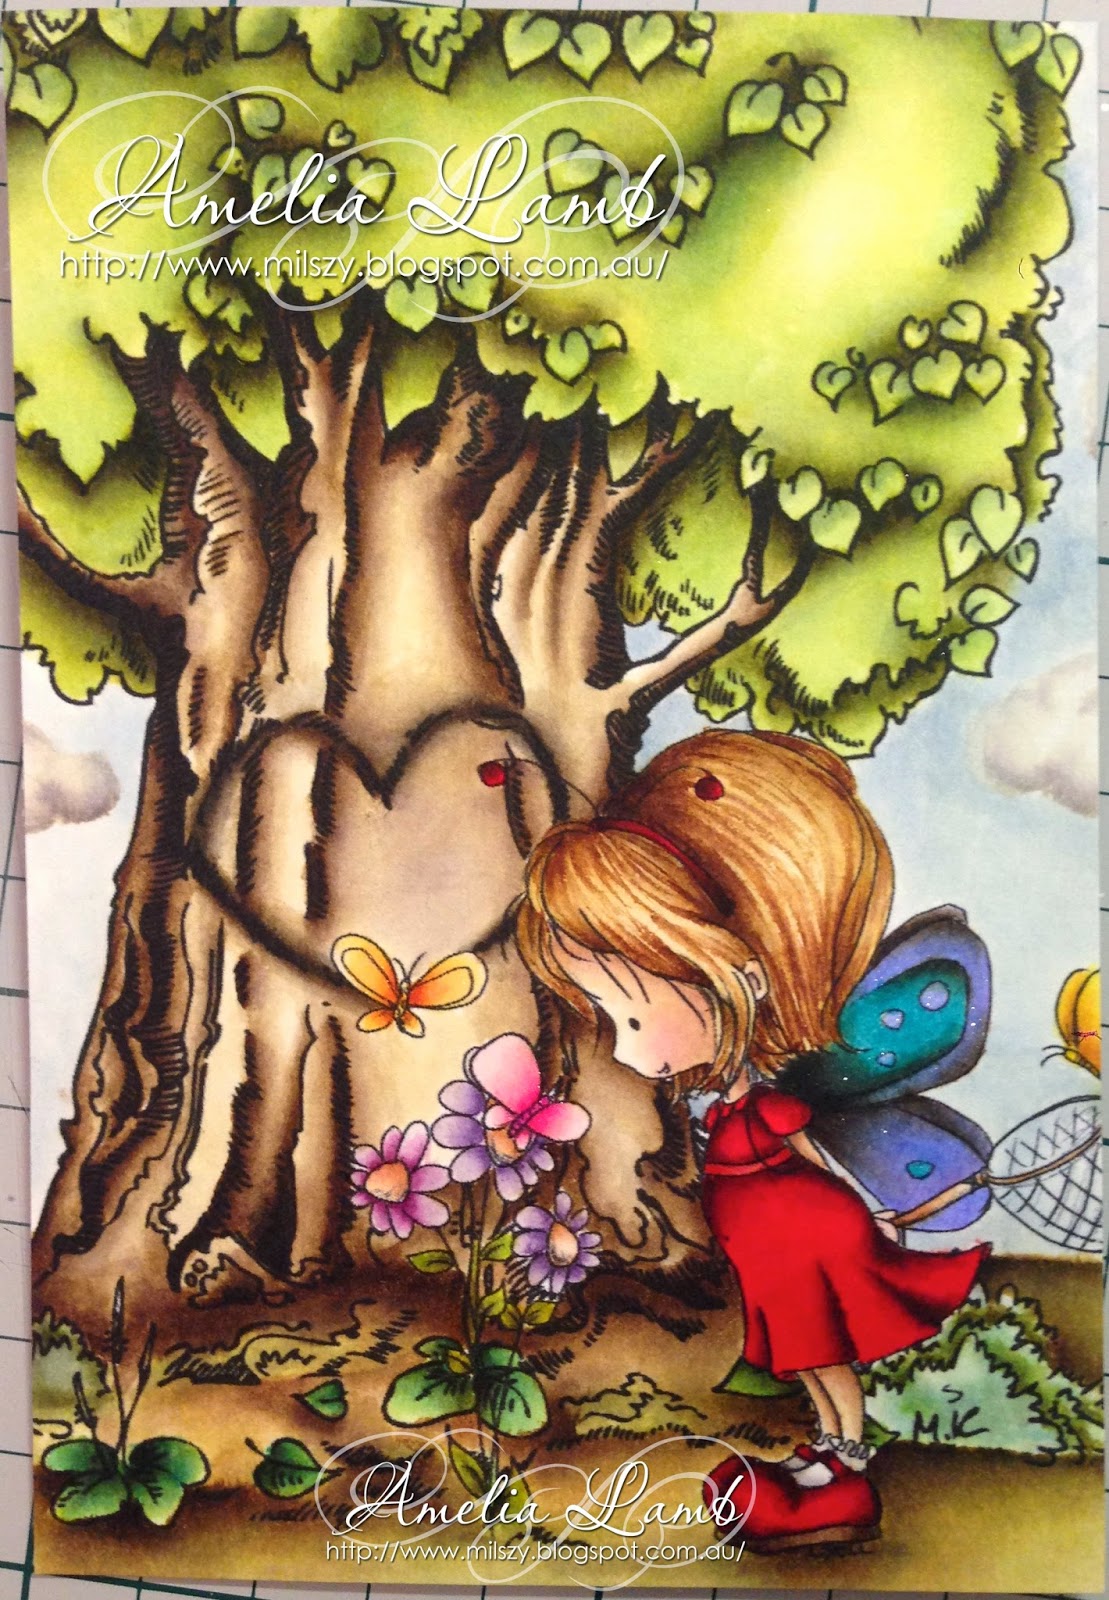
Today has been a gorgeous day here in Adelaide, lots of beautiful sunshine and I have spent the day inside under artificial light finishing off my little scene I showed you in yesterday's post.

A short and sweet post to show you my finished product as now that i have finished I must get to all the chores I have been ignoring all weekend... boring!!

I would like to enter this piece into the following two challenges - 

Make it Colourful challenge # 7 Spring is in the Air
Kit and Clowder March Challenge Wings


Thanks for looking :)

xx


Saturday, 29 March 2014

Distress Inks with Digital Images

Hi, Hello :)

Well it has certainly been awhile between posts, there has been some crafting going on in the background, but projects have been few and far between unfortunately.

However the last few weeks my back injury seems to have settled down, and while there have been some terrible days with it I am starting to feel like I can get back into my colouring again.

Now because I haven't been crafting there has been plenty of time to look through the internet and research, and I finally came across a printer that allows me to print my images and colour with my distress inks.The Epson Dura Brite ink is water proof, and it works sensationally!!

I printed up the cutest little scene to test it out and I have been having such fun.  My images are from Tiddly Inks - Fluttering By to Say Hi and Make It Crafty - Tree of Love.

Firstly I started with the tree trunk and coloured a layer of watered down antique linen as my base colour.


Next layer is Frayed Burlap, this is a rather subtle colour but I like the depth it adds to the final blend.  It helps me to begin planning where I am going to place my shadows.  This is something I am still working on, I think my 'light source' jumps around a bit, but I am having fun, so not super worried, and I figure it will sort itself out over time the more I practice :)


Next, straight to my darkest brown Walnut Stain.  Darkening my shadows, I do this very slowly to ensure I don't get to heavy handed.  Small sections, with many layers of colour until I am happy with the result.  For the love heart on the tree I used a small amount of Black Soot to really define and try and give the illusion it has been burnt into the tree.  A bit of Antique Linen to finish and smooth out all the colours and add some of the colour 'washed away' through the other layers.


Next up the tree top. I missed a photo here whoops - but you get the idea from the first Antique Linen layer I did on the trunk.  For the tree top though a very watered down Shabby Shutters.  The tree top now has some sparkle to as I didn't realise the brush I was using had left over glimmer mist in it....whoops.  Next layer shown below is to start mapping shadows in the leaves with Peeled Paint.


Final shadows are then done with my Forest Moss.  Then i went back in with the Shabby Shutter, this time more concentrated and Peeled Paint to add more roundness and better colour.  The leaves also have a touch of Bundled Sage to try and shadow them without having them blend too much into the rest of the tree top.


So a little more time to paint this afternoon before my Ma's very early Mother's Day present this evening.  We are off to the Festival Theatre to see the Rocky Horror Picture Show and I am sooooo looking forward to it!!  Girls Night :)

Thanks for looking, and feel free to leave any questions if you have them.

xx


Monday, 20 January 2014

Tiddly Inks Birthdays

This year has already seen two birthday celebrations in my circle of friends, and for both ladies I have gone to a Tiddly Inks Wryn stamp.  I love these stamps, so wonderful to colour and to be able to practice making their hair look like individual strands.

First up Miss Sharon's birthday was on January 8th and I coloured up Wryn.


Using Kaisercraft paper she was given a reasonably CAS card layout


Next up, my neighbour miss Nicola's birthday was the 18th.  Although we have lived next door to each other for a number of years our friendship has just started to flourish over the 12 months.  Nicola is not a card maker, and so this is a whole new world for her when I talk about these things I make.  Her reaction when I gave it to her was just beautiful!!  As Nicola is a nurse I used the image Wryn - New Wings


Using black, red, silver and white as my main colours I came up with the following.  I really enjoyed making this card, and putting together the embellishments for it also.


This close up above shows the GORGEOUS effect of aged silver Frantage on the scroll.  I love this stuff, it has silver, grey, black, and a bit of gold all in the one embossing powder and gives you the most amazing effect whilst being so dang simple to use!!


Happy Birthday ladies, I hope 2014 brings you good health, happiness, laughter and may all your dreams come true xx

Thanks for stopping past.

xx


A Labour of Love

I have been lucky to have enough leave saved up to have taken a few extra weeks off over Christmas, unfortunately reality will set in early this coming Thursday morning :(  

However I was determined whilst on leave to work more on my copic colouring and tackle one of the larger images I had printed off over the last few months.

I chose Pearl from the Make it Crafty store, I was determined not to let those gorgeous folds in her dress get the better of me.

I started out with Copic colours R81, R83, R85 and R89 and then to add in even more depth I used my 110.

Due to the size, and me being unable to sit for super long periods of time before my back gives in I had to tackle this project in stages....


Last night I sat down to try and finish the pink section of her dress, by the time I got up it was quarter to 3 in the morning, where the hell did the time go???  Not only did I finish the pink, but I started on the teal edgings and ribbons - BG000, BG01, BG05 and BG09


Tonight she is finished :)  So incredibly happy with the end product.  Due to her size, miss Pearl will never make it on a card, but I think I'll buy her a gorgeous frame and put her up on my wall :)


Thanks for stopping in

xx


Sunday, 29 December 2013

MiC Secret Santa

The fabulous Zoe from Make it Crafty (MiC) organised a fabulous Secret Santa project for this year.  Register and your name will be given to someone and you will get someone else's name to make them a card and put together a small present up to $15 and send it by the end of November.  As soon as I saw the post I registered, I loved this idea!!!

Well that was until I got my Secret Santa recipient and realised that Bron was one of the MiC design team members... cue colouring nerves!!!  I had to come up with something fabulous, and out of my comfort zone, so I put together a whole digi scene to colour using the following three different digi stamps.

Winter Town 
Tinkles
Gift Boxes - Part of the Festive Elements Set
  

This is the most complicated piece I have attempted, and I was so happy with how it turned out!! Although at one stage there I thought it was going to be the death of me, having to sit for this long with a back that is not 100% was just another added challenge to throw into the mix.

Copic Colours

Tinkles -  Red-R32, R35, R37, R59 Green-G20, G21, G24, G28, G29 Hair-E50, E53, E55, E57  Bells-Y15, Y19, Y38
Trees - G21, G94, G99.  E13, E15, E18
Houses - Bricks-E70, E71, E74, E77  Roof-E43, E44, E47
Presents - B93, B95, B97, B99 - BG70, BG72, BG75, BG78 - V01, V04, V06, V09 - B23, B24, B28, B29 - YR15, YR68, YR27 - G02, G03, G05, G07 - RV81, RV83, RV85, RV89

Thanks for looking

xx


Christmas Bells

I managed to finish only 6 more Christmas cards this year on top of the four others shown in recent posts.

Using a Meljen's Design image, Jingle Bell my first three cards I made this year were bit fancier than the last three you will see in this post - just goes to show what can be done when one has more time!!  Three cards using the same  image with slightly different colours, and completely different card designs.


Copic colours used - 
Bell - Y15, Y19, Y38, E13 and E15
Holly - R29, R59, R89, G20, G21, G24, G28 and G29
Ribbon - BG000, BG01, BG05 and BG09 


Copic colours used - 
Bell - Y15, Y19, Y38, E13 and E15
Holly - R29, R59, R89, G20, G21, G24, G28 and G29
Ribbon - V01, V04, V06 and V09


Copic colours used - 
Bell - Y15, Y19, Y38, E13 and E15
Holly - R29, R59, R89, G20, G21, G24, G28 and G29
Ribbon - B91, B93, B95, B97 and B99

The next three cards use an image from a company call Stitchy Bear's Digi Outlet, the image is called Circle of Bells.

I needed to get these three cards in to work on the Friday morning of our last day this year, so at 5am on the Friday morning I was up making up cards.  My images had been coloured during that week, so thankfully I had that much done to make up some cards with.  Once again, three of the same image with three different colour combinations.  These card designs as you will notice are a lot plainer and simpler in design.


Copic colours used - 
Bells - T1, T3, T5, T7 and T9
Holly - R29, R59, R89, G21, G94, G99
Leaves - G24, G28 and G29
Ribbon - BG000, BG01, BG05 and BG09


Copic colours used - 
Bells - Y15, Y19, Y38, E13 and E15
Holly - R29, R59, R89, G21, G94, G99
Leaves - G24, G28 and G29
Ribbon - B91, B93, B95, B97 and B99


Copic colours used - 
Bells - W0, W1, W3, W5
Holly - R29, R59, R89, G21, G94, G99
Leaves - G24, G28 and G29
Ribbon - V01, V04, V06 and V09

Thanks for looking

xx


Sweet Dreams Moon

In the middle of December we had a morning tea to celebrate one of my colleagues heading off on a years Maternity Leave.  For this card I had seen an image that I wanted to use and spent a good couple of hours trawling digi sites trying to find it.  Well I found it and it was a rubber stamp :(  I was so disappointed I needed the card in two days so no time to order it from America.  I had my heart set on this image I had seen and now had to do something else.

As I am googling and searching for new and different digi companies I came across a fabulous site Meljen's Design's.  The images on this site are gorgeous and unique and I ended up walking away with two, which was using major restraint.

For my baby card I bought this gorgeous image called Sweet Dreams Moon.  So by now I had wasted a whole night shopping for a digi and had left myself one night to make my card - nothing like working under pressure!!

Generally I do my best work under pressure, and whilst the gradients are smooth in my colouring, the colours on my picture weren't exactly what I was after, but they work ok.


Copic Colours used - 
Moon - E40, E42, E43 and E44
Stars - Y15, Y19 and Y38
Hat - G20, G21, G24, G28 and G29

Thanks for looking

xx


Make it Colourful Challenge #4 – Red & Green

Making the most of my time off now and working on my colouring.  As I had limited time to make this card, it has to be delivered to an out of town friend tomorrow I kept to the easy challenge at Make it Colourful this month, colouring with red and green.

Yes I know, Floppy from Make it Crafty (MiC) is back again but I do love this little guy... what you're telling me you already knew this??  ;)

To make him a little different this time I have cropped him down to a portrait shot.  I have used the December sketch layout challenge from the MiC Facebook group for my card design.


The bells I got from a Christmas ornament I purchased from my local K-Mart.  They were strung together with a piece of wire to make a little wreath and came in red and white.  I cute the wire, pulled them off and now have a heap of them to use on Christmas cards, they jingle quite nicely too :)  My postmark sentiment is a Kaszazz stamp, one of my favourite Christmas stamps.

A close up of our little Floppy


Copic Colours Used
Hat - Red R35, R37, R59 and R89    Green G20, G21, G94 and G99
Fur Trim - W0, W1 and W2
Belt and Hair - E40, E42, E43 and E44
Eyes - E70, E71, E74 and E77
Skin - E000, E00, E21, E11, E4 and R20

Thanks for looking

xx


Saturday, 28 December 2013

A Make it Crafty Christmas Special

Leading up to Christmas this year I seemed to have plenty of time to make up all my cards ready to go, then it felt like I blinked, Christmas was upon us and I had very few ready to go.  Thankfully there are some understanding people in my group of friends who aren't holding it against me.

So Christmas morning I was up early, not because I have children and there was presents to open from Santa, I had cards to finish!!  I had two to get ready for the day, Ma and I had already decided that we wouldn't stress ourselves, and would give each other our cards after Christmas.  I finally delivered it today!!

So for my two cards for Christmas day I coloured up Floppy from the Make it Crafty (MiC) Store.  I wanted to steer away from traditional colours and so we have two very pastel coloured cards.

First up for my Kris Kringle recipient


This next photo shows the gorgeous sparkle from the Diamond Stickles on those Snowflakes


Finally a close up of the adorable Floppy.  The fur trim on his hat and sleeves is done with Glossy Accents and white flock.


Copic colours - 
Blues - B0000, B000, B00 and B01
White - W0, W1, W2
Shoes and Hair - E40, E42, E43 and E44
Bell - E50, E51, E53

Next up was a card for my Sister and her family.  She has a family of boys, so not really the right colours for the boys in her life, but I know she appreciated it :)


The background paper I made myself with Kaszazz snowflake stamps, pewter embossing powder and Milled Lavender Distress Stain. All the elements have then been edged with Distress Stain Brushed Pewter, it has a gorgeous shine to it as you can see in the next photo.  Unfortunately my sentiment curled with the crackle medium, and definitely didn't turn out the way I wanted it to, but there was no time for me to be able to fix it.


Copic colours - 
Blues - BV000, BV00, BV02 and 0
White - W0, W1, W2
Shoes and Hair - E40, E42, E43 and E44
Bell - E50, E51, E53

So as I mentioned above, I delivered Ma's Card to her today. Using another MiC image - Fairy Bauble.  As you can probably tell I love the MiC images, just so much fun to colour, and they almost always provide me with a new challenge in learning to use Copics.

I tried to make it matching the december sketch challenge on the MiC Facebook group, but found out I had printed my image too big.  So still keeping the basic elements I moved the image left, the banner right and came up with the following


Papers are from Maja and Kaisercraft matted with Chocolate and White Shimmer card stocks respectively.  The sentiment is also Kaisercraft.


Copic Colours - 
Bauble - E40, E42, E43, E44, E47 and E49
Hair - E40, E42, E43, E44 and a touch of E47 inside the curls
Wings - E70, E71, E74 and E77
Wings - E70, E71, E74, E77 and E79
Holly - G20, G21, G94 and G99
Berries - R35, R37, R59, R89
Eyes - BG01, B01, B00, B000 and B0000

I would like to enter my final card, Fairy with Bauble into the MiC Facebook Design Team call for January to April 2014.  **fingers crossed**

Thanks for having a look today,  I hope you and you families had a lovely Christmas and I wish you a safe, happy and healthy New Year for 2014.

xx


Sunday, 1 December 2013

You and Me Always & Forever

Hello everyone,

Here today to share with you my first ever card with Tiddly Inks images.  I fell in love with this cute as range of images seeing them on other blogs, and through Facebook.  I resisted going to their store for so long as I just knew I wouldn't be getting out of their cheaply :)

One of my awesome team mates at work is getting married before Christmas so the perfect excuse to go and get the You and Me image I have been eyeing off for soooo long now!!  While browsing through the rest of the store I also came across Amanda's Arch and thought they would work perfectly together and make such a super Wedding card!!

So without any further ado my coloured image


Apologies for the quality of this photo it was taken on my little colouring desk I have in the lounge room, which doesn't have the best light.

Coloured with Copics I used the following colours

Skin - E000, E00, E21 and E11
Hair - Hers-E40, E43, E47, E49   His- E13, E15, E18
Dress - E50, E51 and E53
Suit - T9, T7, T5, T3, T1
Roses - BV20, BV23, BV25, BV29 - V91, V93, V95, V99 - RV91, RV93, RV95, RV99 - B93, B95, B97, B99

The finished card


Paper used was from Kaisercraft Homemade Collection called Cosy Cottage.  Such gorgeous paper!!

Thanks for stopping by.

xx


Related Posts Plugin for WordPress, Blogger...