Good Evening :)
I have spent time this evening updating my Pinterest with images of cards and getting up to date with the Copic Colours of the Day from Jennifer Dove. I am finally done and ready to head off to bed and realise I haven't shared with you a few more cards I have made recently, three with images from A Day for Daisies, and one from Tiddly Inks
I came across ADFD about 6 months ago now but resisted buying any of the images until just recently. They certainly have a unique look to them and bring something different to the digital image world.
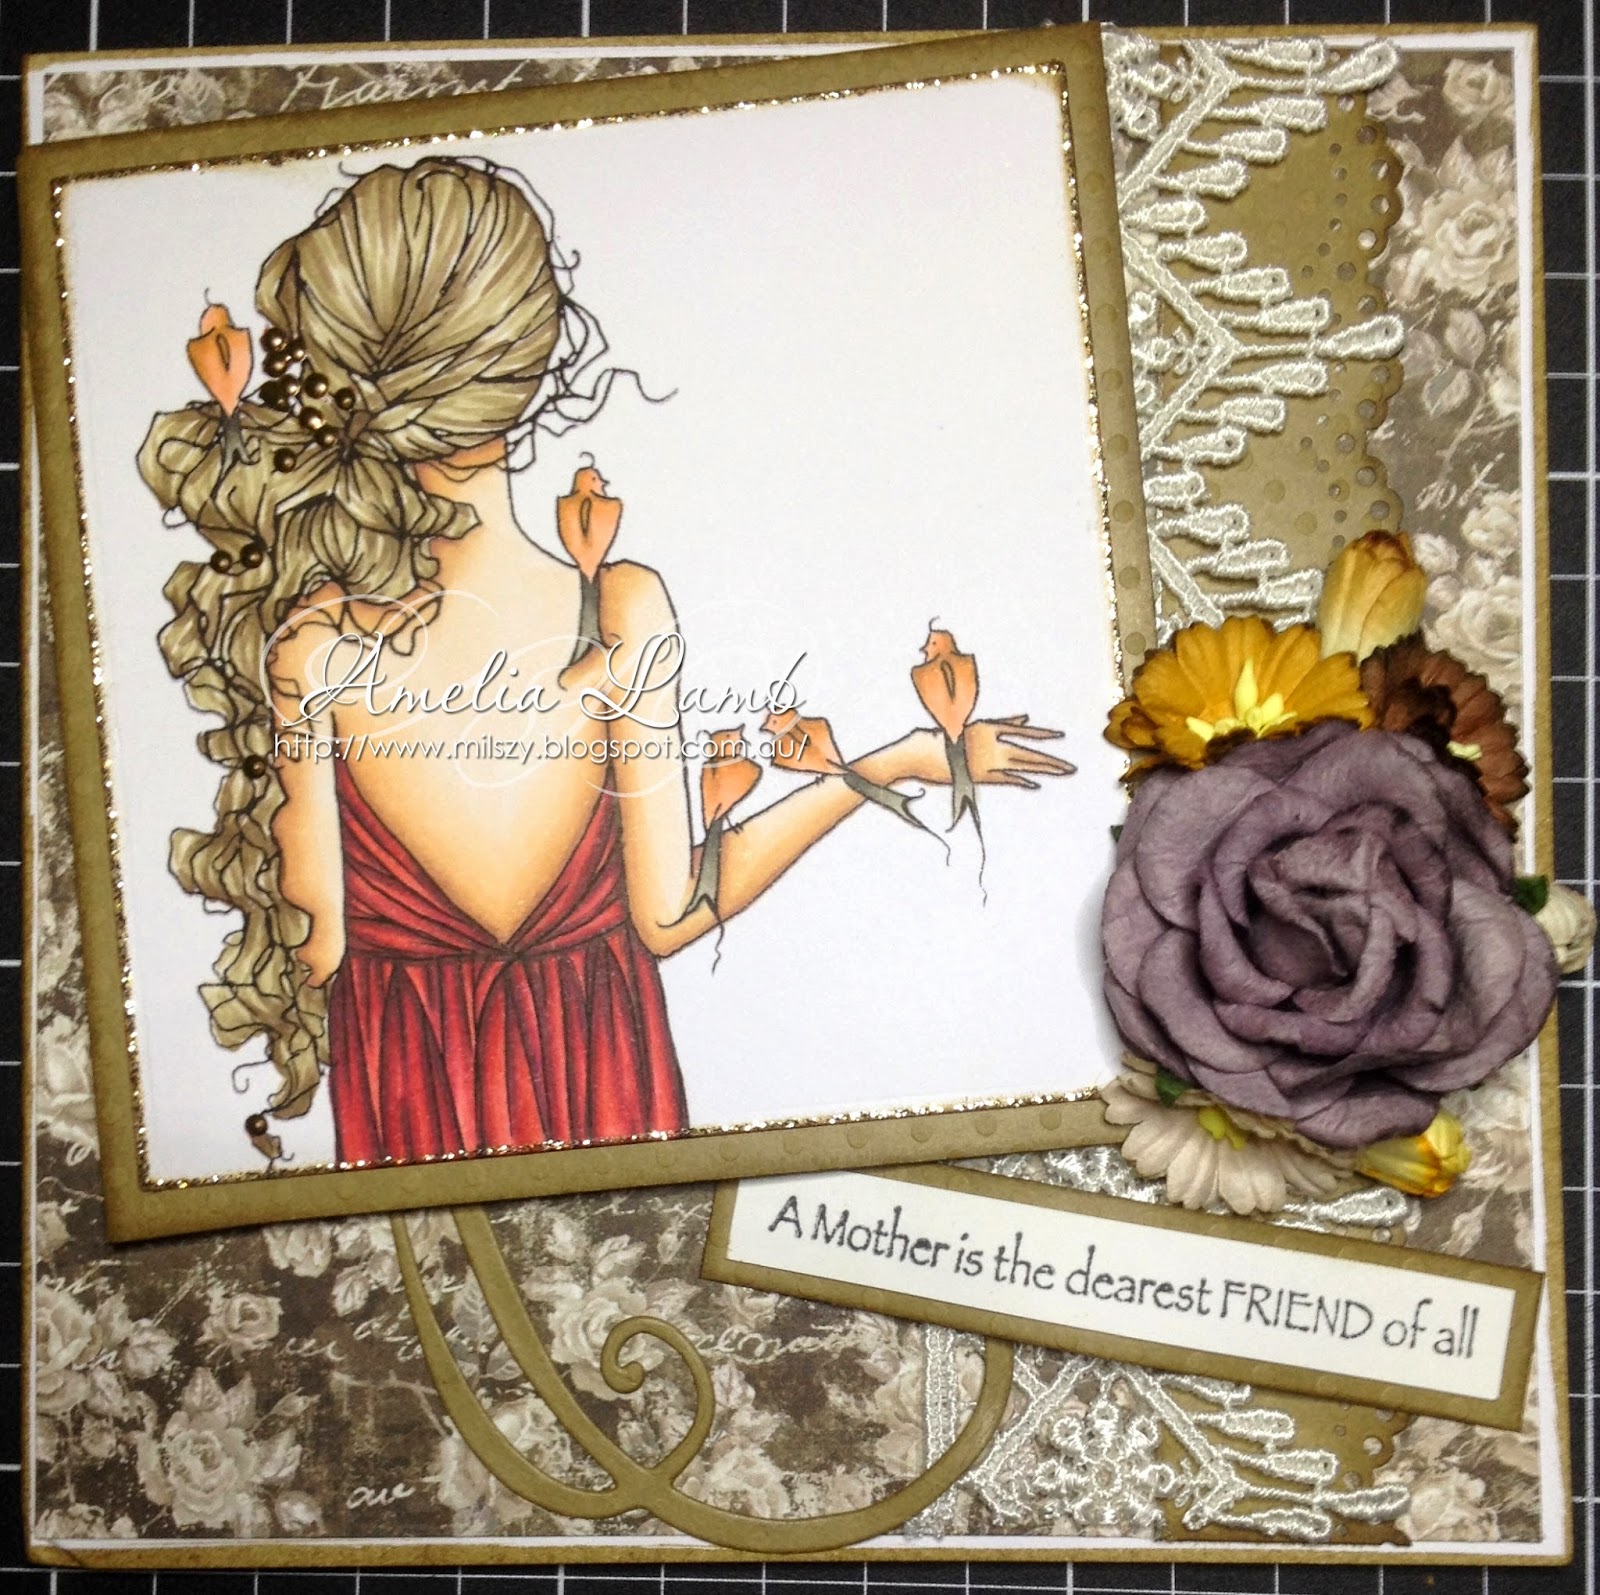
First up is a card I made for Miss C with Spring Flower Hair
This year for my Ma's birthday I went with another ADFD image Pearls in my Hair, this was the first image I saw from ADFD and was always on my list to make a card with.
The sentiment came from some Kaisercraft mini stamps I have, and was just perfect!!
Next is an image call Bewildered B, when I first saw the line art for this I wasn't sure how I was going to colour all that gorgeous hair, but once I had broken it down it was actually quite easy :o) This was such a fun image to colour up.
Finally a birthday card without using an ADFD image :o) This image is from Tiddly Inks called Druscilla. This was my first attempt at two tone clothing, and I think it worked out pretty well for a first go :o)
Thanks for stopping by
xx
Showing posts with label Tiddly Inks. Show all posts
Monday, 22 September 2014
Sunday, 27 July 2014
Time flies when you are having fun...
Hi there and Hello :)
An hour or so ago and I was on the couch struggling to stay awake, check my email and find some amazing news and so not sleepy anymore..but more on that later ;)
As I have so many projects to catch up on I am going to post a lot of photos and try and keep the words to a minimum tonight so I can get my blog back up to date with where I am at with all my projects.
I hope you enjoy, you may want to make a coffee before you start ;) and if you have any questions on Copic/Distress colours used, or other materials please feel free to leave me a comment and I'll do my best to help you out :) Links to images used are all the way through to help you out :)
Starting with the two Mother's Day projects I made this year, my Ma's present made with Aurora Wings Image White Poppy and coloured with Distress Inks
For my sister's Mothers Day Card I used a Hannah Lynn Image - Cali Girl
Miss K's birthday is another Hannah Lynn image available through Crafts and Me - Amber Eyes
Happy Birthday Shinks with Kraftin Kimmie's Birthday Friends and background paper made by using Annabelle Stamps - Scribble Scrabble 1
For beautiful new baby Isla I used Saturated Canary's Butterfly Baby masked with Make it Crafty's Daffodil Dell
This one was a commission piece using two Magnolia Stamps masked, On the Road Tilda and Tulip Walkway
For handsome baby boy Kaan - the image is from Little Miss Muffet Stamps - Babe Moon Lullaby
Gorjuss little Ladybird Gorjuss Girl :)
A card for a very special Miss J using Saturated Canary's Butterfly Princess, zoomed and cropped
Participating in a colouring competition over in the Kit and Clowder Facebook group I bought this beautiful image from The Stamping Chef - Alyce. I had so much fun with this image and really pushed myself out of my comfort zone with the colours I used and I was super happy with the results!!
This next piece is also courtesy of a Kit and Clowder Facebook group colouring competition. This gorgeous image is from The East Winds - Floral Kiss I was lucky enough to be a random winner of two free digis from this competition, one of which you will see below. This card was for Miss N, which also marks my 1 year anniversary for using Copic Markers. I used markers on an image for Miss N's birthday for the first time last year :)
My nephew turned 6 on the 16th July and when I asked Mr W what sort of picture he would like on his card he said he wanted a dinosaur. So I picked this image as I thought it looked like him dressed up in a dinosaur costume. This image is from Tiddly Inks - King of the Wild Ones
A very soft and lovely birthday card for Miss L using one of the digi's I won in the Kit and Clowder colouring competition. From The East Wind - 'Aurora' Daisy. I was so, SO happy with how the hair turned out on this image, it shows that my classes with Alyce at Kit and Clowder are definitely paying off!
Next up a card for my best mate's husband, using another image from The Stamping Chef, Miss Smexy. It was only as I was uploading and watermarking this evening that I realised I forgot to colour her eyes... I want to fix them!!!
For my favourite Miss S's birthday this year I used this cute as stamp from La-La Land - Ladybug Marci - I love Ladybirds!!
This next piece was a step WAY out of my comfort zone. I keep seeing all these gorgeous 'no lines' coloured images, but hadn't been confident enough until now to try it. This little cutey from Tiddly Inks - Whatcha Doing?, seemed like the perfect image to try it out for the first time, not to complicated. Super happy with how this turned out!!
This card for JLo was made using Tiddly Inks - For the Birds
For Miss J another Tiddly Inks Image - Ellie Says Hi
Last up tonight another image from a Kit and Clowder Facebook Group colouring Competition. This image was offered a free image to the members of Kit and Clowder from All Dressed Up. I tried to do something a little different by using my gold prisma pencil and add a touch of face paint/make up to her face to try and fit the theme.
We are there, I hope you are still awake ;)
Thanks so much for looking and please feel free to leave any questions below
xx
An hour or so ago and I was on the couch struggling to stay awake, check my email and find some amazing news and so not sleepy anymore..but more on that later ;)
As I have so many projects to catch up on I am going to post a lot of photos and try and keep the words to a minimum tonight so I can get my blog back up to date with where I am at with all my projects.
I hope you enjoy, you may want to make a coffee before you start ;) and if you have any questions on Copic/Distress colours used, or other materials please feel free to leave me a comment and I'll do my best to help you out :) Links to images used are all the way through to help you out :)
Starting with the two Mother's Day projects I made this year, my Ma's present made with Aurora Wings Image White Poppy and coloured with Distress Inks
For my sister's Mothers Day Card I used a Hannah Lynn Image - Cali Girl
Miss K's birthday is another Hannah Lynn image available through Crafts and Me - Amber Eyes
Happy Birthday Shinks with Kraftin Kimmie's Birthday Friends and background paper made by using Annabelle Stamps - Scribble Scrabble 1
For beautiful new baby Isla I used Saturated Canary's Butterfly Baby masked with Make it Crafty's Daffodil Dell
This one was a commission piece using two Magnolia Stamps masked, On the Road Tilda and Tulip Walkway
For handsome baby boy Kaan - the image is from Little Miss Muffet Stamps - Babe Moon Lullaby
Gorjuss little Ladybird Gorjuss Girl :)
A card for a very special Miss J using Saturated Canary's Butterfly Princess, zoomed and cropped
Participating in a colouring competition over in the Kit and Clowder Facebook group I bought this beautiful image from The Stamping Chef - Alyce. I had so much fun with this image and really pushed myself out of my comfort zone with the colours I used and I was super happy with the results!!
This next piece is also courtesy of a Kit and Clowder Facebook group colouring competition. This gorgeous image is from The East Winds - Floral Kiss I was lucky enough to be a random winner of two free digis from this competition, one of which you will see below. This card was for Miss N, which also marks my 1 year anniversary for using Copic Markers. I used markers on an image for Miss N's birthday for the first time last year :)
My nephew turned 6 on the 16th July and when I asked Mr W what sort of picture he would like on his card he said he wanted a dinosaur. So I picked this image as I thought it looked like him dressed up in a dinosaur costume. This image is from Tiddly Inks - King of the Wild Ones
A very soft and lovely birthday card for Miss L using one of the digi's I won in the Kit and Clowder colouring competition. From The East Wind - 'Aurora' Daisy. I was so, SO happy with how the hair turned out on this image, it shows that my classes with Alyce at Kit and Clowder are definitely paying off!
Next up a card for my best mate's husband, using another image from The Stamping Chef, Miss Smexy. It was only as I was uploading and watermarking this evening that I realised I forgot to colour her eyes... I want to fix them!!!
For my favourite Miss S's birthday this year I used this cute as stamp from La-La Land - Ladybug Marci - I love Ladybirds!!
This second image shows the gorgeous sparkle from the Wink of Stella brush I used on her wings
This next piece was a step WAY out of my comfort zone. I keep seeing all these gorgeous 'no lines' coloured images, but hadn't been confident enough until now to try it. This little cutey from Tiddly Inks - Whatcha Doing?, seemed like the perfect image to try it out for the first time, not to complicated. Super happy with how this turned out!!
This card for JLo was made using Tiddly Inks - For the Birds
For Miss J another Tiddly Inks Image - Ellie Says Hi
Last up tonight another image from a Kit and Clowder Facebook Group colouring Competition. This image was offered a free image to the members of Kit and Clowder from All Dressed Up. I tried to do something a little different by using my gold prisma pencil and add a touch of face paint/make up to her face to try and fit the theme.
We are there, I hope you are still awake ;)
Thanks so much for looking and please feel free to leave any questions below
xx
Labels:
All Dressed Up,
Aurora Wings,
Copic,
Distress Ink,
Gorjuss,
Hannah Lynn,
La La Land,
Little Miss Muffet,
Magnolia,
Make It Crafty,
Saturated Canary,
The East Wind,
The Stamping Chef,
Tiddly Inks
Monday, 5 May 2014
It's Time for a Catch Up...
Good evening,
Although I can be terrible at keeping my blog up to date, there is still plenty of colouring and card making in the background.
Tonight's post is all about catching up on the projects I have made and not posted. This will be very picture heavy, so grab a cuppa and enjoy.
The first project I would like to share is the card I made for my Sister for her birthday. Being that she is so Awesome I had to make her a spectacular card. This Saturated Canary Sweater Socks Fairy was a little bigger than a normal card so I had to think outside the square a bit for this project and made her more like a plaque. There is a little hidey hole behind the Tim Holtz butterfly die cut that I tucked a matching tag with the message.
The Second project was a card I made with an image I have shown previously. This card was for my gorgeous and fabulous hairdresser. I thought Melyssa from Make it Crafty with all this gorgeous hair was just perfect for a hairdresser :)
My third project was a card I made for my youngest Nephew Alexander for his second birthday. This little Rocket Boy image and sentiment came from Tiddly Inks and the planet I found in a free colouring page. The star was a standard shape from Pages :) The stars on this project look a little grainy and funny, but that is because they are covered in glow in the dark embossing powder, works a treat!!
The fourth project was a birthday card for a friend of mine. This one was a week or two late unfortunately, but thankfully B didn't mind - he knows how terrible I am lol. This little monster was put together using the Monster Elements sets available from Little Miss Muffet Stamps.
The fifth project was a card I was asked by B to make for his Mum. For the last three years I have been making cards for him for his Mum's birthday. My Ma had given me this gorgeous Flourishes Cherry Blossom stamp set for my birthday, and I thought it was just perfect. Embellished with lovely Wild Orchid Craft flowers and a Martha Stewart Punch Around the Page plaque, simple and elegant :)
My sixth project was for my friend J's birthday. J loves everything Tinkerbell and has a whole display of all her Tink trinkets and cards. Using the Butterfly swing from Make it Crafty I merged a free colouring page image of Tink.
My seventh and eighth projects to share were from Easter this year. I had promised my oldest nephew a Bookmark to use when reading his Harry Potter series I had bought for him. I was planning on using Wizard Boy from Tiddly Inks, but when I was showing him the picture he liked the Tiddly's Be My Mummy better, so I used it to make this bookmark for him.
Just before Easter I was lucky enough to win a free digital image from Little Miss Muffet Stamps for my anniversary card I made (Shown in the post titled Weddiversary). I chose this gorgeous Easter Bunny Hiding and made 3 cards for my 3 little men to put with their Easter presents.
My ninth project was a piece I coloured with my Copics using a Hannah Lynn digital stamp called Cali Girl available through Crafts and Me. I love the style of Hannah Lynn images, one of the first stamps I bought when starting to colour was Hannah's Genevieve, and it is still one of my absolute favourites. I actually realised after I had taken this photo that I hadn't finished off her eyes properly. Since taking this picture I have coloured the centres in black and added back in the white reflective dots off centre from the middle of the eye. I was so happy with how this turned out, and especially her eyes and skin.
The last two incredibly cheeky ;) projects I have to share use the same image available through Redonkadoodles called Cheeky Greeting. These cards have been made for colleagues of mine, both have a great sense of humour and cheeky personalities, so I couldn't resist this image for the lads :)
Phew... and we are there!! I think I may be caught up on blogging all my recent projects!! All of these images have been coloured with Copics, if you have any questions on colours used, just drop me a line and I will see what I can do to try and remember the combinations, note to self, must write this stuff down!!
Keep an eye out for the upcoming Mother's Day projects, I have spent all day in the craft room today working on one of my images in distress inks, and there is still more painting to go!! I wish I could share the progress as I am so happy with how it is looking, but I know that my Ma looks here to see what I have been up so I'll just have to wait.
Thanks for looking and I hope you enjoyed today's photo gallery :)
xx
Although I can be terrible at keeping my blog up to date, there is still plenty of colouring and card making in the background.
Tonight's post is all about catching up on the projects I have made and not posted. This will be very picture heavy, so grab a cuppa and enjoy.
The first project I would like to share is the card I made for my Sister for her birthday. Being that she is so Awesome I had to make her a spectacular card. This Saturated Canary Sweater Socks Fairy was a little bigger than a normal card so I had to think outside the square a bit for this project and made her more like a plaque. There is a little hidey hole behind the Tim Holtz butterfly die cut that I tucked a matching tag with the message.
The Second project was a card I made with an image I have shown previously. This card was for my gorgeous and fabulous hairdresser. I thought Melyssa from Make it Crafty with all this gorgeous hair was just perfect for a hairdresser :)
My third project was a card I made for my youngest Nephew Alexander for his second birthday. This little Rocket Boy image and sentiment came from Tiddly Inks and the planet I found in a free colouring page. The star was a standard shape from Pages :) The stars on this project look a little grainy and funny, but that is because they are covered in glow in the dark embossing powder, works a treat!!
The fourth project was a birthday card for a friend of mine. This one was a week or two late unfortunately, but thankfully B didn't mind - he knows how terrible I am lol. This little monster was put together using the Monster Elements sets available from Little Miss Muffet Stamps.
The fifth project was a card I was asked by B to make for his Mum. For the last three years I have been making cards for him for his Mum's birthday. My Ma had given me this gorgeous Flourishes Cherry Blossom stamp set for my birthday, and I thought it was just perfect. Embellished with lovely Wild Orchid Craft flowers and a Martha Stewart Punch Around the Page plaque, simple and elegant :)
My sixth project was for my friend J's birthday. J loves everything Tinkerbell and has a whole display of all her Tink trinkets and cards. Using the Butterfly swing from Make it Crafty I merged a free colouring page image of Tink.
My seventh and eighth projects to share were from Easter this year. I had promised my oldest nephew a Bookmark to use when reading his Harry Potter series I had bought for him. I was planning on using Wizard Boy from Tiddly Inks, but when I was showing him the picture he liked the Tiddly's Be My Mummy better, so I used it to make this bookmark for him.
Just before Easter I was lucky enough to win a free digital image from Little Miss Muffet Stamps for my anniversary card I made (Shown in the post titled Weddiversary). I chose this gorgeous Easter Bunny Hiding and made 3 cards for my 3 little men to put with their Easter presents.
My ninth project was a piece I coloured with my Copics using a Hannah Lynn digital stamp called Cali Girl available through Crafts and Me. I love the style of Hannah Lynn images, one of the first stamps I bought when starting to colour was Hannah's Genevieve, and it is still one of my absolute favourites. I actually realised after I had taken this photo that I hadn't finished off her eyes properly. Since taking this picture I have coloured the centres in black and added back in the white reflective dots off centre from the middle of the eye. I was so happy with how this turned out, and especially her eyes and skin.
The last two incredibly cheeky ;) projects I have to share use the same image available through Redonkadoodles called Cheeky Greeting. These cards have been made for colleagues of mine, both have a great sense of humour and cheeky personalities, so I couldn't resist this image for the lads :)
Phew... and we are there!! I think I may be caught up on blogging all my recent projects!! All of these images have been coloured with Copics, if you have any questions on colours used, just drop me a line and I will see what I can do to try and remember the combinations, note to self, must write this stuff down!!
Keep an eye out for the upcoming Mother's Day projects, I have spent all day in the craft room today working on one of my images in distress inks, and there is still more painting to go!! I wish I could share the progress as I am so happy with how it is looking, but I know that my Ma looks here to see what I have been up so I'll just have to wait.
Thanks for looking and I hope you enjoyed today's photo gallery :)
xx
Sunday, 30 March 2014
March Challenges
Good afternoon bloggers,
Today has been a gorgeous day here in Adelaide, lots of beautiful sunshine and I have spent the day inside under artificial light finishing off my little scene I showed you in yesterday's post.
A short and sweet post to show you my finished product as now that i have finished I must get to all the chores I have been ignoring all weekend... boring!!
I would like to enter this piece into the following two challenges -
Make it Colourful challenge # 7 Spring is in the Air
Kit and Clowder March Challenge Wings
Thanks for looking :)
xx
Saturday, 29 March 2014
Distress Inks with Digital Images
Hi, Hello :)
Well it has certainly been awhile between posts, there has been some crafting going on in the background, but projects have been few and far between unfortunately.
However the last few weeks my back injury seems to have settled down, and while there have been some terrible days with it I am starting to feel like I can get back into my colouring again.
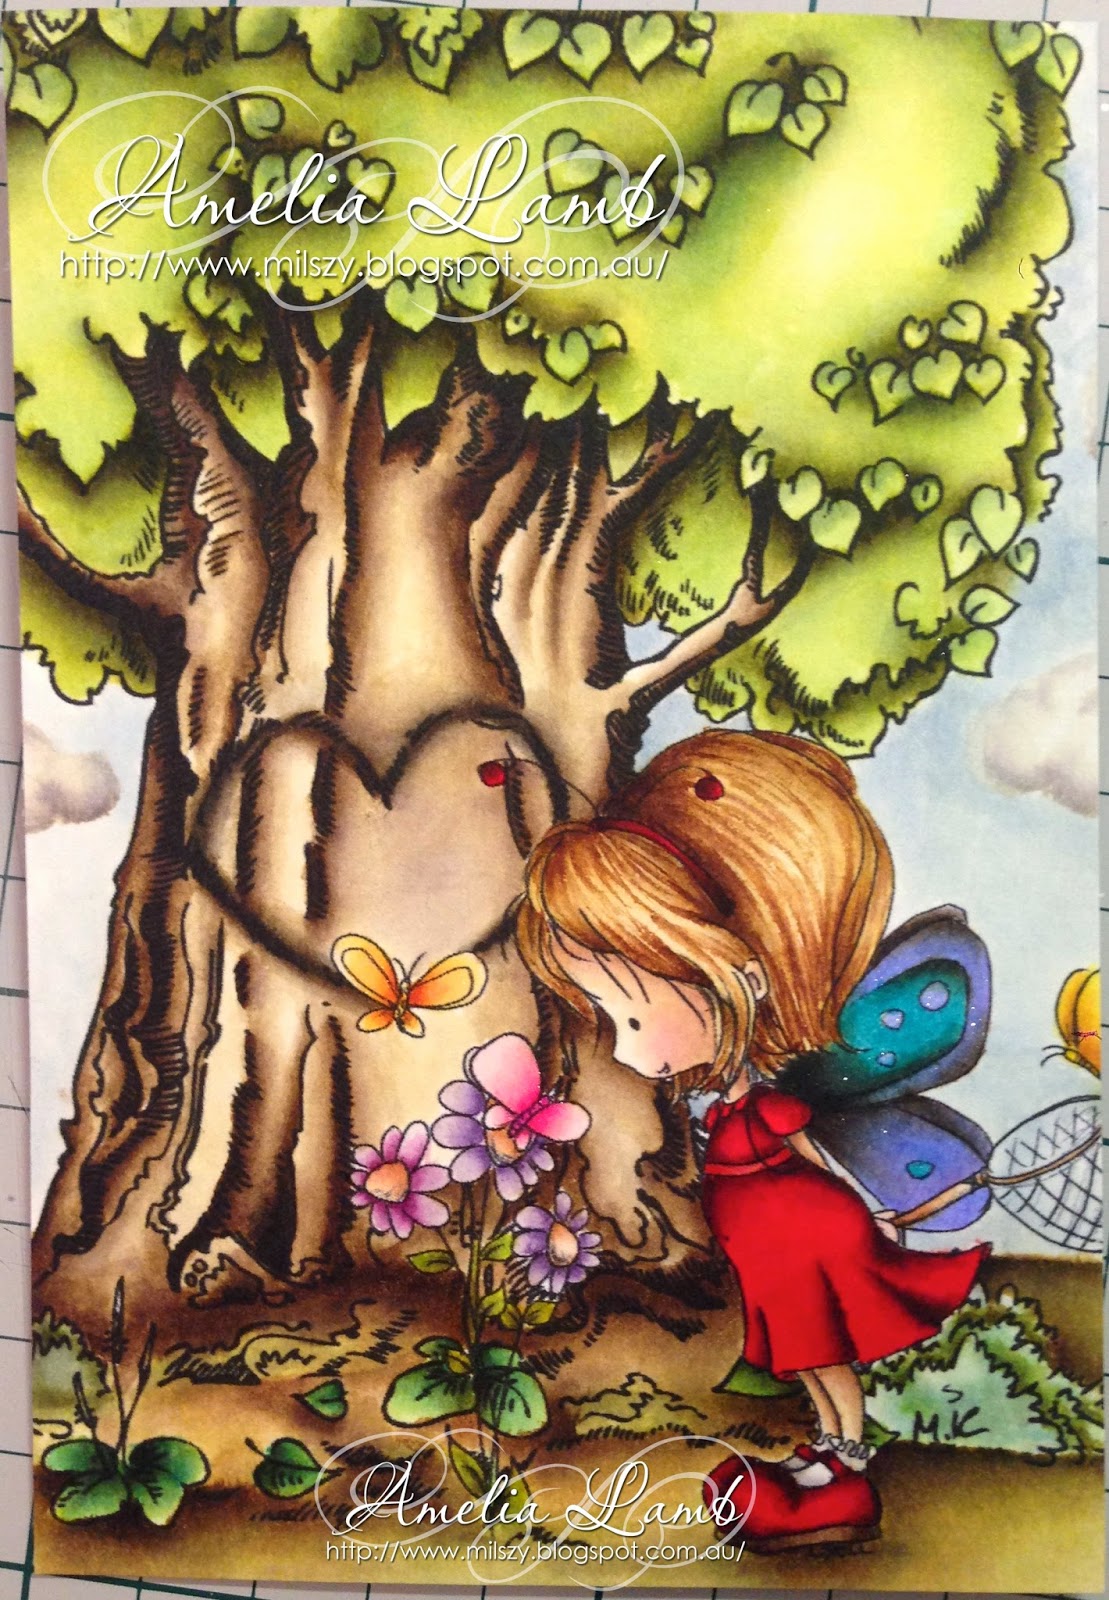
Now because I haven't been crafting there has been plenty of time to look through the internet and research, and I finally came across a printer that allows me to print my images and colour with my distress inks.The Epson Dura Brite ink is water proof, and it works sensationally!!
I printed up the cutest little scene to test it out and I have been having such fun. My images are from Tiddly Inks - Fluttering By to Say Hi and Make It Crafty - Tree of Love.
Firstly I started with the tree trunk and coloured a layer of watered down antique linen as my base colour.
Final shadows are then done with my Forest Moss. Then i went back in with the Shabby Shutter, this time more concentrated and Peeled Paint to add more roundness and better colour. The leaves also have a touch of Bundled Sage to try and shadow them without having them blend too much into the rest of the tree top.
So a little more time to paint this afternoon before my Ma's very early Mother's Day present this evening. We are off to the Festival Theatre to see the Rocky Horror Picture Show and I am sooooo looking forward to it!! Girls Night :)
Thanks for looking, and feel free to leave any questions if you have them.
xx
Well it has certainly been awhile between posts, there has been some crafting going on in the background, but projects have been few and far between unfortunately.
However the last few weeks my back injury seems to have settled down, and while there have been some terrible days with it I am starting to feel like I can get back into my colouring again.
Now because I haven't been crafting there has been plenty of time to look through the internet and research, and I finally came across a printer that allows me to print my images and colour with my distress inks.The Epson Dura Brite ink is water proof, and it works sensationally!!
I printed up the cutest little scene to test it out and I have been having such fun. My images are from Tiddly Inks - Fluttering By to Say Hi and Make It Crafty - Tree of Love.
Firstly I started with the tree trunk and coloured a layer of watered down antique linen as my base colour.
Next layer is Frayed Burlap, this is a rather subtle colour but I like the depth it adds to the final blend. It helps me to begin planning where I am going to place my shadows. This is something I am still working on, I think my 'light source' jumps around a bit, but I am having fun, so not super worried, and I figure it will sort itself out over time the more I practice :)
Next, straight to my darkest brown Walnut Stain. Darkening my shadows, I do this very slowly to ensure I don't get to heavy handed. Small sections, with many layers of colour until I am happy with the result. For the love heart on the tree I used a small amount of Black Soot to really define and try and give the illusion it has been burnt into the tree. A bit of Antique Linen to finish and smooth out all the colours and add some of the colour 'washed away' through the other layers.
Next up the tree top. I missed a photo here whoops - but you get the idea from the first Antique Linen layer I did on the trunk. For the tree top though a very watered down Shabby Shutters. The tree top now has some sparkle to as I didn't realise the brush I was using had left over glimmer mist in it....whoops. Next layer shown below is to start mapping shadows in the leaves with Peeled Paint.
Final shadows are then done with my Forest Moss. Then i went back in with the Shabby Shutter, this time more concentrated and Peeled Paint to add more roundness and better colour. The leaves also have a touch of Bundled Sage to try and shadow them without having them blend too much into the rest of the tree top.
So a little more time to paint this afternoon before my Ma's very early Mother's Day present this evening. We are off to the Festival Theatre to see the Rocky Horror Picture Show and I am sooooo looking forward to it!! Girls Night :)
Thanks for looking, and feel free to leave any questions if you have them.
xx
Subscribe to:
Posts (Atom)